Since the actual cause isn’t known most of the time, follow the methods below sequentially, and one of them should fix your issue. Before you get started, you can try to narrow down the issue by going to Task Manager in Windows 10 and looking for the process or program that’s hogging your disk. You can right-click on the Start button and choose Task Manager or you can press Ctrl + Shift + Esc together to open it. Click on the Processes tab and then click on the header for the Disk column to sort it. When performing methods 2 and 3 below, you can start with the process that’s using the highest percentage of the disk.
1. Restart Your PC
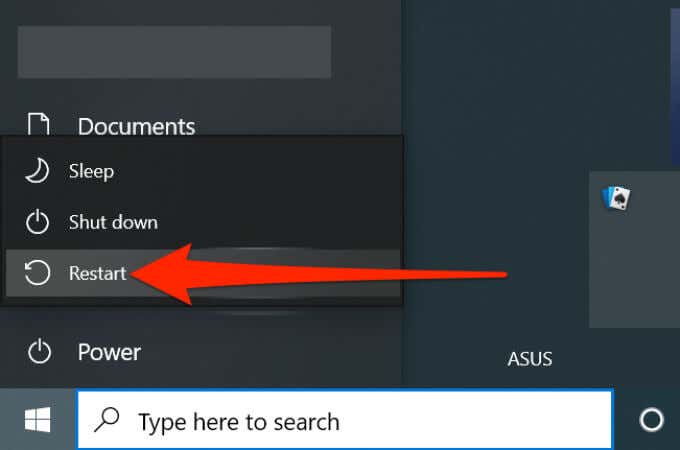
When you restart your PC, many temporary settings get reset. This is useful to fix various types of issues, and can possibly fix the 100% disk usage issue. To reboot your PC, open the Start menu, select the power icon, and choose Restart.
2. Disable Startup Programs
If your PC shows 100% disk usage when you first log onto the computer, but then the usage settles down after a few minutes, your startup programs are probably the culprit. These programs launch when your PC boots and they eat up a lot of resources. In this case, you should turn all these startup programs off and see if that improves your disk usage by following the steps listed below:
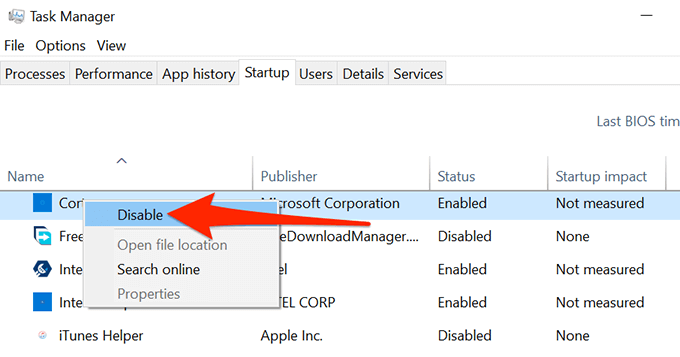
Right click on the Start menu and click on the Task Manager.Click on More Details on the bottom left of the pop up window.Select the Startup tab. Right-click each program on the list and select Disable.
Restart your PC and see if the issue is resolved
You can always re-enable any startup program after you complete this test. It’s also worth noting that disabling the startup of a program does not uninstall it. You can run the program any time, you just have to manually launch it.
3. Perform a Clean Boot of Your PC
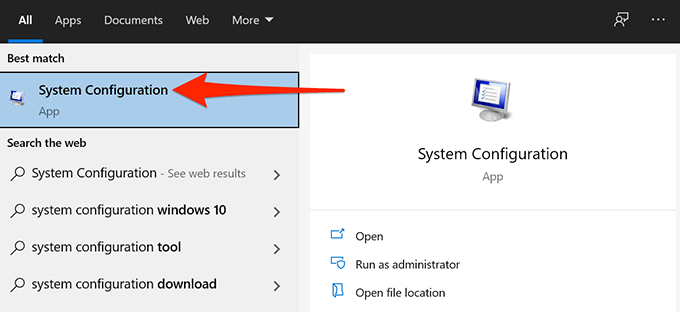
When you clean boot your Windows 10 PC it only loads selected programs and services. This helps identify particular apps that may be causing the disk usage to reach 100%. Disable the identified apps to see if the issue gets fixed. In Windows 10, use the built-in System Configuration app to perform a clean boot. We have a dedicated guide on how to do that, so check that out. It’s a bit of a time-consuming process, but it works really well for these types of situations.
4. Update Your PC
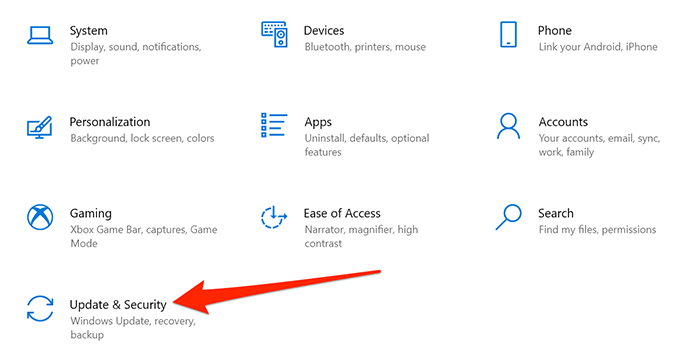
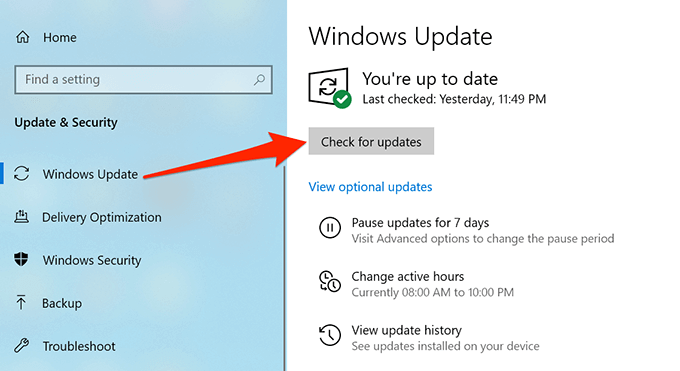
You should always install the latest Windows updates as soon as they become available because they install bug fixes to enhance performance and could fix your disk usage issue, too. Follow these steps to update your Windows 10 PC: Reboot your PC to make sure the newly installed updates work properly.
5. Disable Scheduled Disk Defragmentation
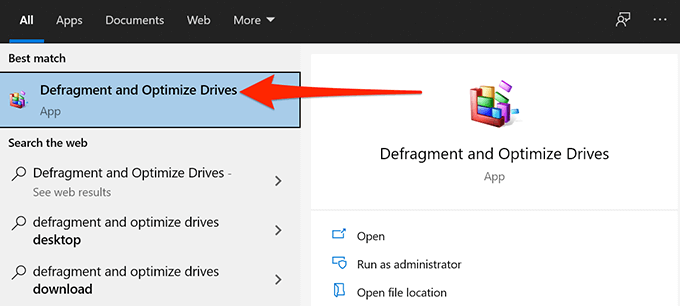
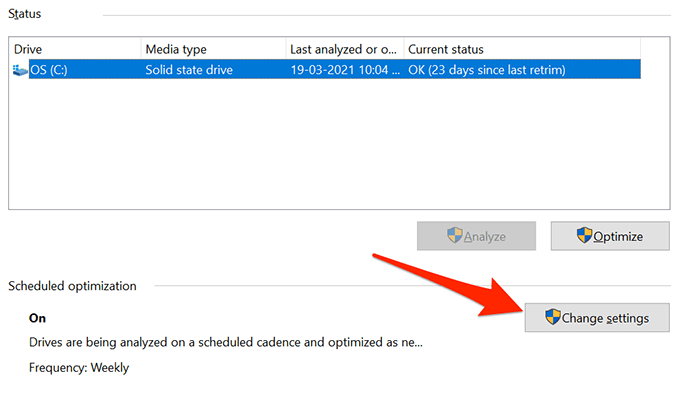
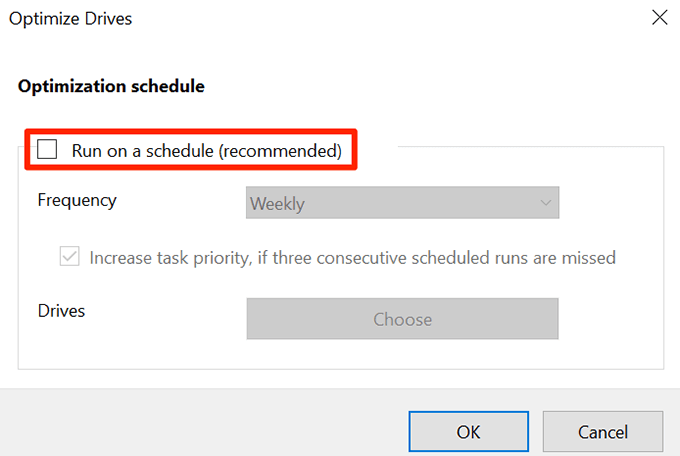
If Windows 10 shows 100% disk usage only at specific times, scheduled disk defragmentation could be the cause. This is because the defragment task runs automatically at scheduled times and uses a lot of disk space. Turn the scheduled disk defragmentation off and see if that fixes your problem. You can always manually run a defragment task using the defrag utility. In the future, if you need to defrag your disks, select the Optimize button in the above utility. This runs a manual defragmentation task.
6. Delete Temporary Files
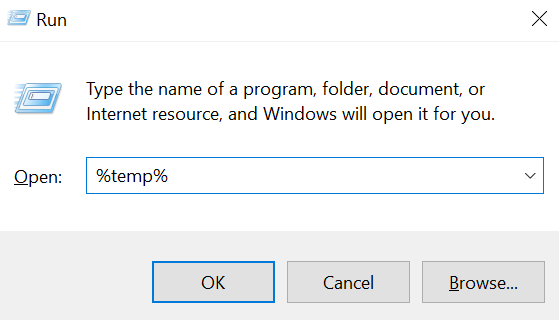
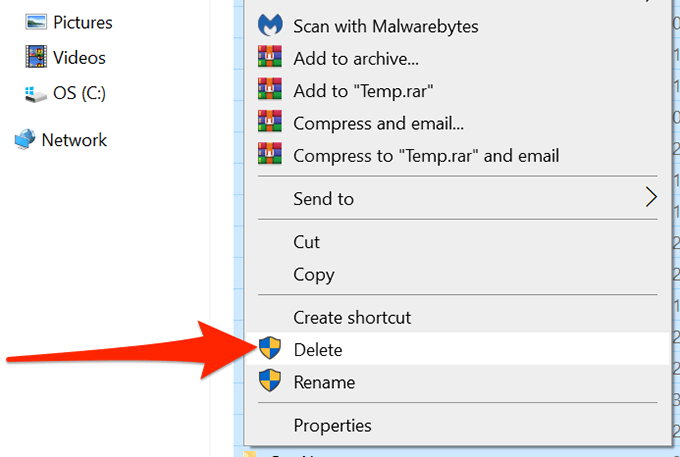
Many Windows 10 features and installed apps create temporary files that don’t need to be preserved.You can clear your temporary files using the following steps to see if that fixes the 100% disk usage problem. This should, hopefully, fix the problem.
7. Repair Corrupt Files
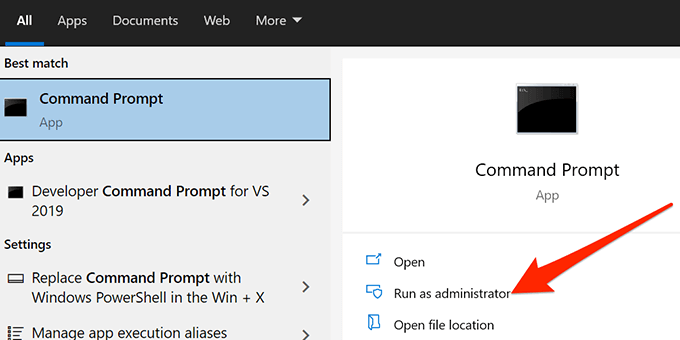
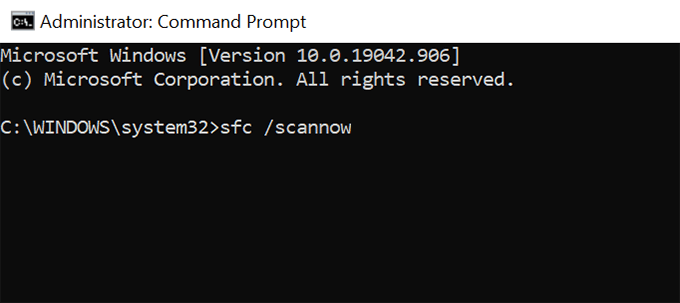
A corrupt system file can cause the disk usage to hit 100%. However, Windows 10 has a built-in tool to fix these files. You can follow the steps below to simply run the command to enable this tool. Wait for the process to finish and if this doesn’t take care of the issue move on to the steps below.
8. Run a Security Scan
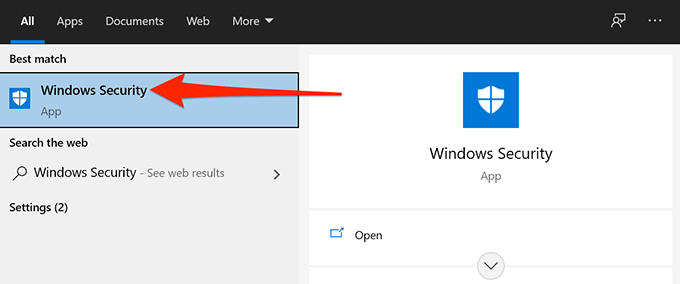
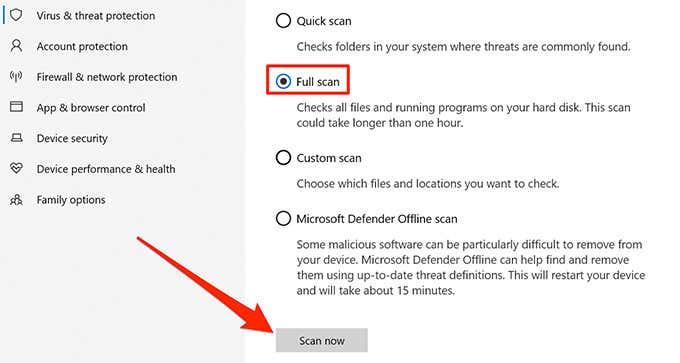
One possible reason your PC shows 100% disk usage is that your PC may be infected with a virus or malware. You can run Windows 10’s built-in antivirus program to find and remove any malicious files from your PC by following the steps below. Wait for the antivirus program to find and remove viruses and malware from your computer, which will hopefully resolve the issue.
9. Modify Energy Options
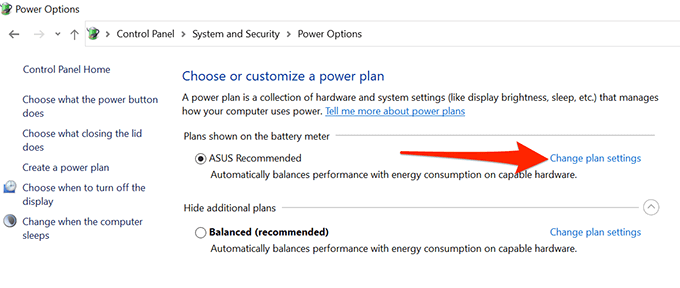
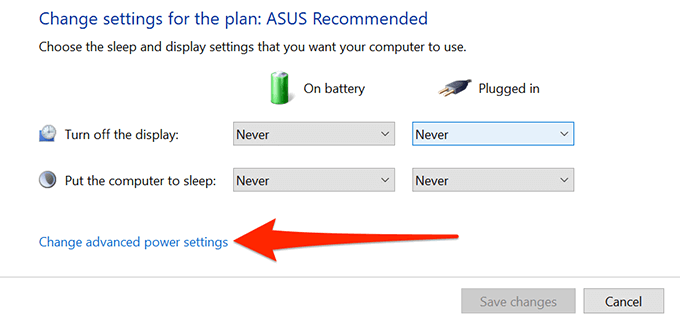
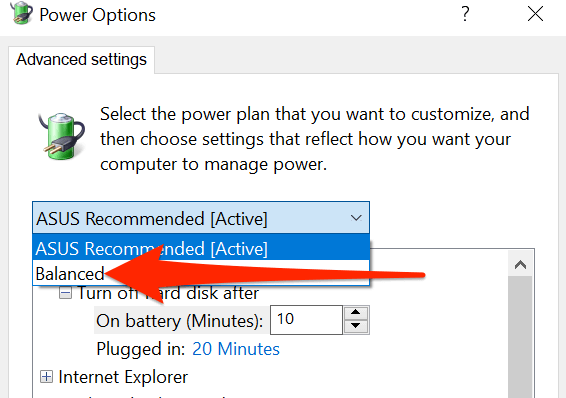
Some users report that changing the energy plan can fix the 100% disk usage issue in Windows 10. 7. Click the dropdown menu at the top and cycle through the other options with a PC reboot between each selection. For example, if this menu has Balanced as the current selection, change it to one of the other available options. Select Apply or OK at the bottom to save your changes. Reboot the PC. 8. If this does not fix the problem, repeat Step 7 with the other available options. You can always go back and select the original energy plan if this does not fix the problem and try the steps mentioned below next.
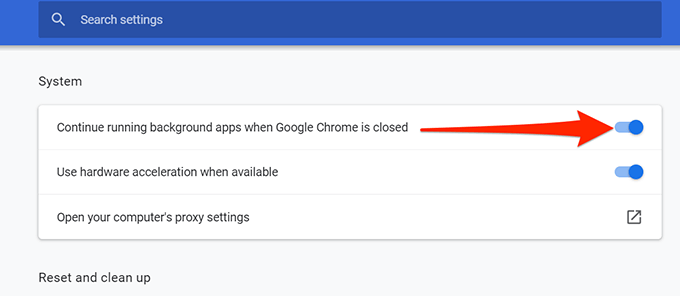
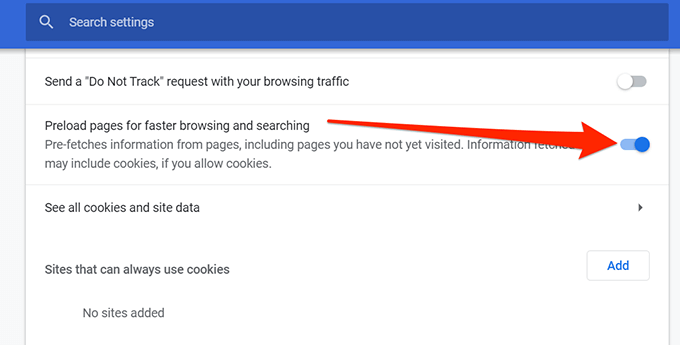
10. Change Google Chrome Options
If you use Google Chrome, there are options in this browser that can cause your disk usage to reach 100%. Turn these options off and see if this resolves your problem. You can always re-enable the options if this does not fix the issue and move on to the next step mentioned below.
11. Turn Off Your Antivirus Program
If you’re running a third-party antivirus program, you want to make sure it’s not causing this issue by temporarily disabling it. Also, Windows 10 comes loaded with an antivirus called Microsoft Defender Antivirus that does a pretty great job of catching most malware and spyware, thus negating the need for a third-party program in the first place.
12. Clean Install Windows 10
If none of the above methods work, your last resort is to clean install Windows 10 on your computer. This removes everything that your PC currently has, and installs a fresh version of the Windows 10 operating system. Make sure you backup your important files before you do that, or you’ll end-up losing your files.
