Unfortunately, even the best Chromebooks can have charging problems. It’s not uncommon to have your Chromebook plugged in for charging, but the battery gets stuck to a certain percentage and won’t charge over it. Sometimes it can also happen that your Chromebook won’t charge at all. There are various reasons why this could happen. You can fix some of these malfunctions on your own, so here’s what you need to do to get your Chromebook up and running again.
Most Common Reasons for Charging Failure
Different Chromebook manufacturers like Lenovo, Samsung, and Asus, have one thing in common. They all run ChromeOS. This is what makes the troubleshooting process the same for any ChromeOS device.
When your Chromebook fails to charge, it usually means a problem with the charger or the battery. But it could also be an issue with the Chrome operating system, which you can fix with an update. However, if you suspect it’s a hardware issue, it could be one of the following:
The charger isn’t connected properly. The charger is frayed or for some reason, it doesn’t receive power properly. The wall outlet is not working. The Chromebook wasn’t charged in a while.
That said, here’s what you can do to charge your Chromebook.
1. Check the Power Cable and Connection Outlets
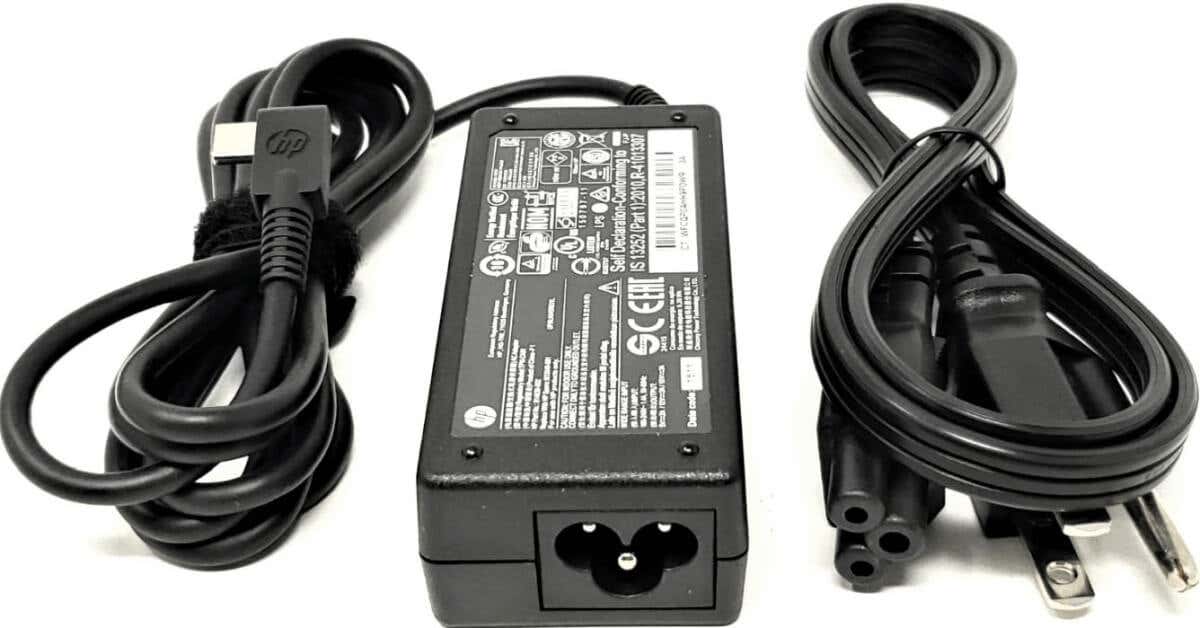
The charger is the first and most natural thing to check if your Chromebook isn’t charging. You need to check the physical components of your device first, especially if you have never dealt with this issue before. Your AC adapter might have some visible damage to it. Check the adapter’s prongs and the charging cable for visible cracks, bends, or foreign material. Then check the casing of the power adapter for holes, missing pieces of plastic, and any damage beyond superficial scratches. You must also check if the adapter is correctly plugged into the power source. Sometimes the charger prongs can wiggle out of the electrical socket, especially if you move around with the Chromebook while it’s plugged in. AC adapters for Chromebooks typically have two cables. One goes from the wall outlet to the adapter, and the second from the adapter to the device. You need to check if both are correctly plugged on all ends. Make sure they are properly fitted in their correct entry points. If the charger seems fine and properly plugged into the socket, the problem might be with the power outlet itself. You need to check if the outlet is providing electricity. You can use an electricity tester tool or a pen if you have one, but if you don’t know what you’re doing, call an electrician. That said, the simpler solution is to plug your Chromebook into another outlet in your home.
2. Check the LED Indicator Light Status
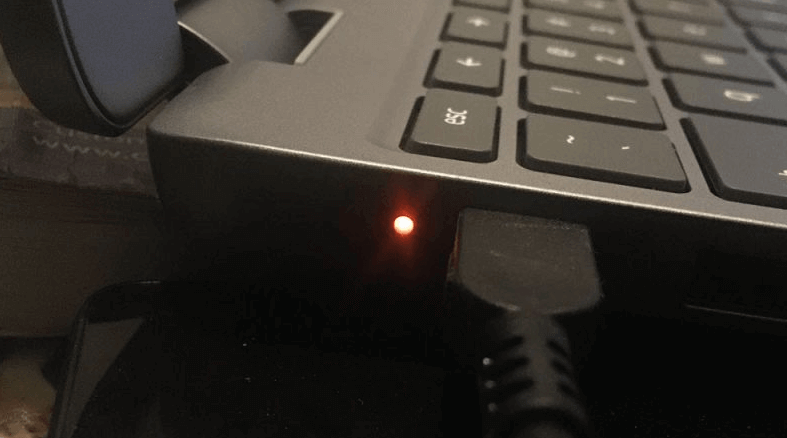
Depending on the manufacturer, some Chromebooks have an LED indicator light right next to the charging port. This light tells you if the device is detecting the charger. If you can see the light, then your Chromebook is getting power. If the LED light remains off even when you plug in the charger, that indicates a problem with the Chromebook’s battery.
But first, leave the charger plugged in for several minutes and check the light. It could be that your Chromebook is so out of juice that the LED indicator doesn’t have enough power to work. Then charge the device for at least 30 minutes before turning it on. If your screen doesn’t turn on even after charging your Chromebook, perhaps the problem is with the screen itself.
A word of caution: If the LED indicator light is off, but the bottom of your Chromebook is heating up, unplug the charger to prevent further damage to it or the battery.
3. Restart the Chromebook
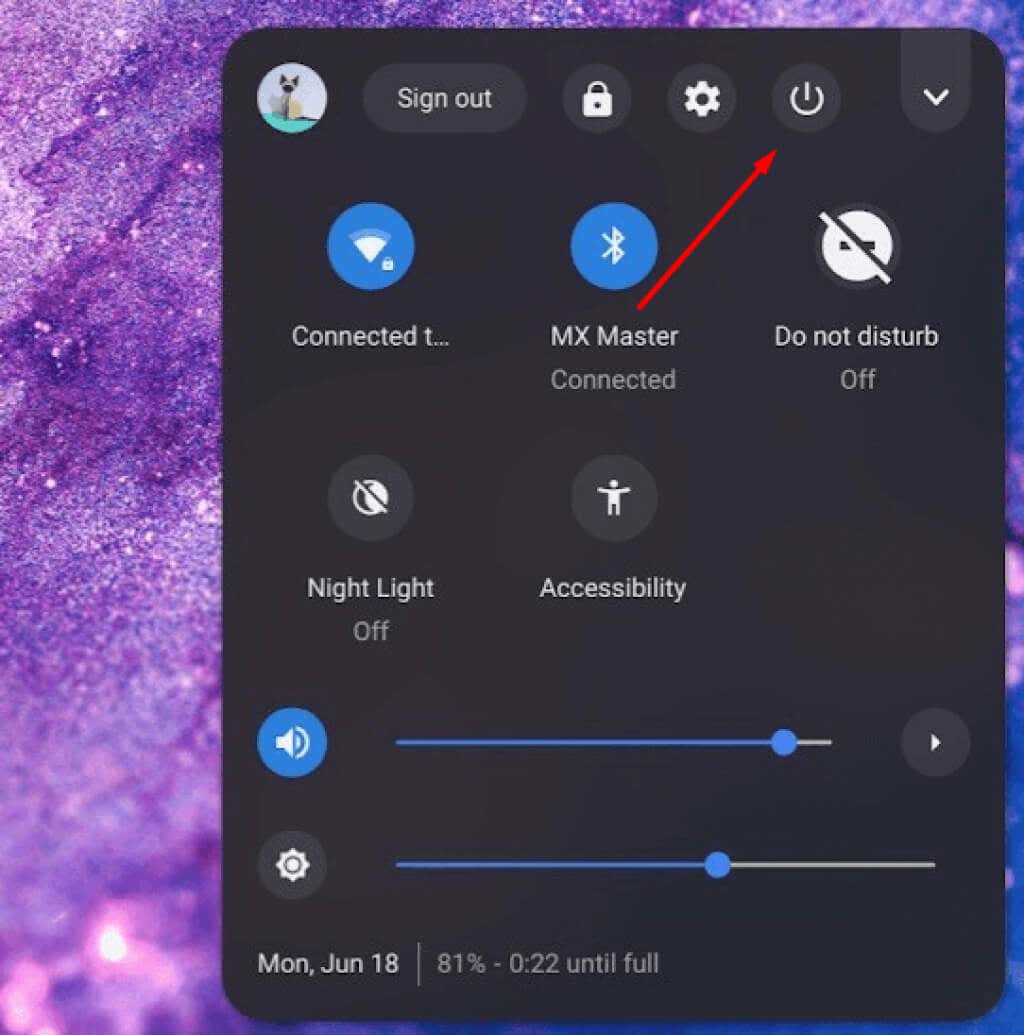
Sometimes, all your Chromebook needs to start charging again is a simple restart. Once the Chromebook is back on, all its systems will be reset, and it might start charging. Here’s what you need to do:
4. Perform the Embedded Controller (EC) Reset
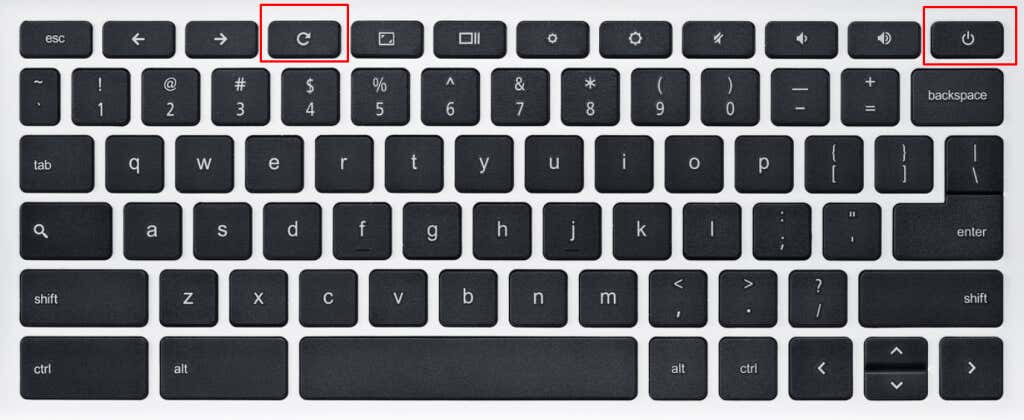
An Embedded Controller reset is the hard reset of your device that will reset all its hardware and software settings. If your Chromebook is not charging, it could be because it’s frozen. Ensure the charger is plugged into your device before you unfreeze it with the EC. To perform the EC follow these steps: Note: Contact the manufacturer if the Chromebook doesn’t power on, even after the Embedded Controller reset.
5. Run the AC Adapter Charge Verification
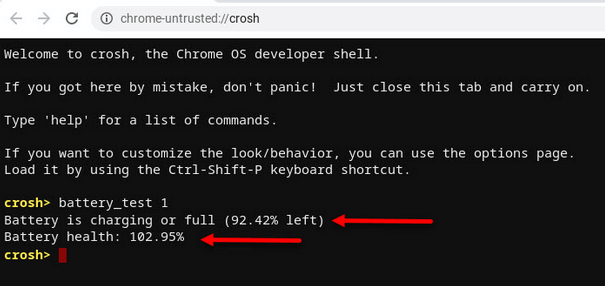
If your Chromebook has some battery power to stay on for some time, but it won’t charge beyond a certain percentage, you can run the AC adapter charge verification. This is a Chromebook feature that will tell you if the power adapter is supplying the device with power. Follow these steps to check the AC adapter: If you receive the Battery is discharging status, you should try another charger to see if your Chromebook will start charging after you run this diagnostic. If your battery health displays below 50% or Unknown, it means your Chromebook needs a new battery. If your Chromebook isn’t charging after trying these tips, take it to your nearest certified repair center. In the meantime, let us know what worked (or didn’t work) for you in the comments below. Also, do you have any other genius tricks for getting a dead Chromebook back to life?
